Baking and cooking my way through the cold Alaska winters keeps me from getting cabin fever. With the help of my husband and our three dogs, we manage to maintain our sanity through adventures in our kitchen and our hometown, Fairbanks.
Thursday, September 27, 2012
Roasted Turkey and a full freezer
The boys were successful hunting. They brought home two moose, which is plenty of meat for the 5 of them that went out. My brother took a couple of coolers full of meat, and we'll send a cooler down to Dan from Georgia, then divide the rest between my oldest son, who lives in town, my brother in law and us. We will send some down to the kids in the states, but they really don't have a lot of freezer space and it is so expensive to ship, but they like having a little moose in their freezer to remind them of home and feed to their friends.
Needless to say, our freezer is very full with meat right now. I'm down to two containers of chicken stock and won't be able to make and store some any time soon.
We also had two turkeys, yes two, left over from last November. The grocery store I shop at gives a free turkey for every $100 or so you spend, so I shop in small increments those two weeks they run that special. We usually have one at Thanksgiving, one on New Year's Day and donate the rest to the food bank. For some reason this year we did not get them donated and they sat in a cooler on the back deck for a couple of days until Dave decided they had started to thaw and we needed to cook them. So we cooked two turkeys. One we (meaning Dave) deep fried, and one we (meaning me) roasted. We invited friends over to have dinner with us and we wouldn't let them leave without bags of turkey.
We will have turkey sandwiches, and I'll make some soup with turkey, I'll also freeze bags for my lunch. Did I mention that Dave doesn't like turkey? Yea, I'm going to eat a lot of turkey in my lunch for a while.
Perfect Roasted Turkey
1 turkey, rinsed, cleaned and stuff in the cavity removed (you know the neck and that stuff)
1 onion
2 stalks celery
1 lemon
1 bunch fresh thyme
3 Tbsp. butter
1 cup chicken stock
Salt
Pepper
Turkey Gravy
2 cups broth from roaster after turkey is cooked
2 Tbsp. butter
2 Tbsp. all-purpose flour
Preheat the oven to 400ºF.
Rinse the turkey and clean the bits of feathers that always get overlooked. Make sure the cavity is empty (some people save this for gravy, I don't). Place turkey, breast side up, in a roasting pan. Gently slide your hands between the skin and the breast meat. Place pats of butter under the skin. Salt and pepper the turkey inside the cavity and on the skin.
Cut the onion in half and peel, chop celery into 3-4 inch long sticks, and quarter the lemon; place in the cavity of the turkey, add the bunch of thyme. Pour 1 cup stock into bottom of roasting pan. Cover turkey with foil and place in oven. Roast for 1 hour, turn oven down to 350 and roast for about 10-13 minutes per pound, or until thermometer inserted into thigh registers 165ºF. During the last 2 hours, remove the foil and bast with broth from the roaster.
When turkey is cooked, remove from oven and place turkey on platter, cover with foil to rest for 20 minutes. Strain broth from roaster, cool slightly and skim fat from top.
To make gravy:
Melt butter in a medium sauce pan over medium heat. When butter is melted and stops foaming, sprinkle in flour, stir until flour is incorporated into the butter. Let cook, stirring frequently, until a golden brown color. Whisk in two cups turkey broth that has been strained and de-fatted. Bring to a boil to thicken. Taste and add salt and pepper to adjust seasoning.
Tips:
I always start my turkey a little early, it can rest more than 20 minutes if you need it to. On big holidays, I'll let it rest, have Dave carve it, refrigerate it and reheat it just before the meal. Don't ever leave your turkey at room temperature move than 1 hour (I think if you google it, experts will say 2 hours, but why risk it?).
The ratio of the gravy is easy to adjust it is just one Tbsp. of flour and butter to every cup of liquid. Cook the flour and butter so it is a nice toasty brown to remove that raw flour taste.
September 27, 2012 Daylight 11 hours, 40 minutes, 24 seconds Temp 43º F
Tuesday, September 25, 2012
Soup and Sandwich Night, Roasted Tomato Soup
O.K., so football season doesn't officially start until after the Yankees win the World Series or they are eliminated from the play-offs, but they do have these games on t.v. that Dave always wants to watch. Our t.v. is upstairs and we don't, as a rule, eat in front of the t.v., except for Mondays during football season (Dave is trying to get Thursdays in too but so far I've resisted).
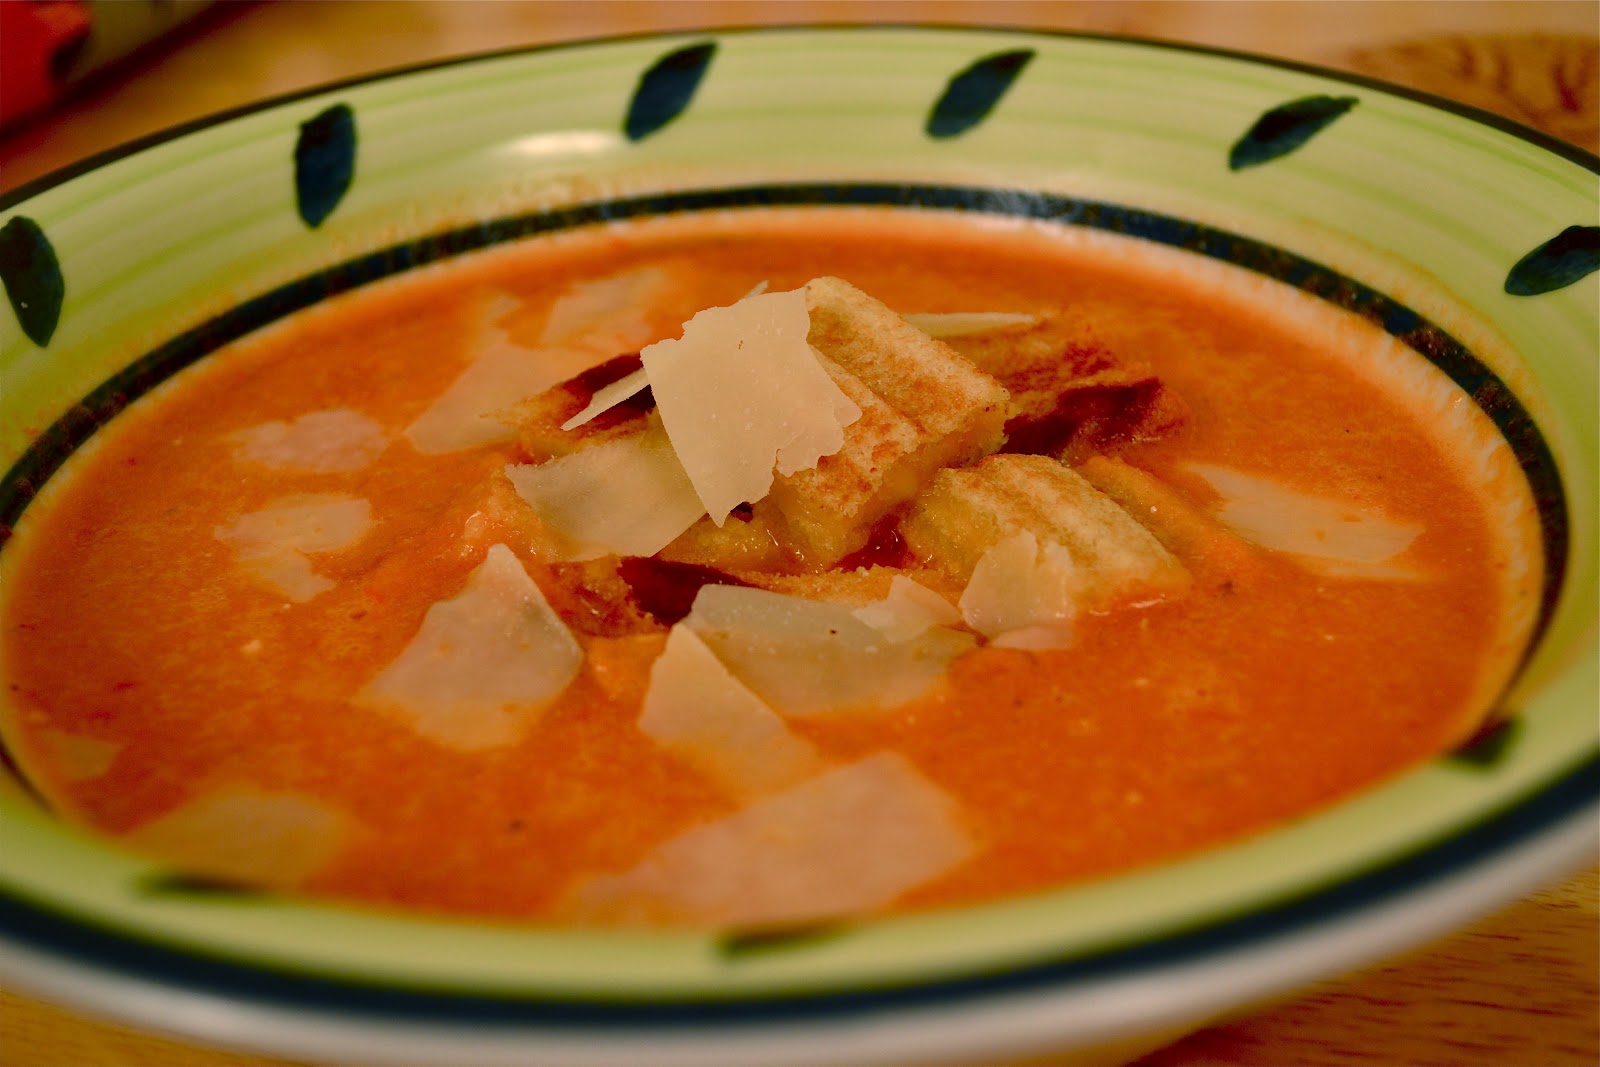
Dave is back from moose camp (they were successful with 2 moose this year), so Monday night football officially started at our house. I usually fix soup and sandwiches for dinner on Monday during football season, it is warm, it is filling, and with the sandwich, Dave will put up with soup for dinner. To start our season off, I'm using the last of the red tomatoes from the greenhouse for the soup. Along with the regular sandwich, I've made grilled cheese croutons. The sandwich has to have meat so I'll make a meatloaf sandwich with some left-over meatloaf, and cook it on the sandwich press.
I tend to fix the same soup and sandwich combo over and over. I'd love to hear from you on your favorite combos and I'll try them out on the picky-eater (Dave). Thanks for your help!
Roasted Tomato Soup
- 2 1/2 pounds fresh tomatoes
- 6 cloves garlic, peeled
- 2 small yellow onions, sliced
- 1/2 cup extra-virgin olive oil
- Salt and freshly ground black pepper
- 1 quart chicken stock
- 2 bay leaves
- 4 tablespoons butter
- 3/4 cup heavy cream
Preheat oven to 450 degrees F.
Wash, core and cut the tomatoes into halves. Spread the tomatoes, garlic cloves and onions onto a baking tray. Drizzle with 1/2 cup of olive oil and season with salt and pepper. Roast for 20 to 30 minutes, or until caramelized.
Remove roasted tomatoes, garlic and onion from the oven and transfer to a large stock pot. Add 3/4 of the chicken stock, bay leaves, and butter. Bring to a boil, reduce heat and simmer for 15 to 20 minutes or until liquid has reduced by a third.
Wash and dry basil leaves, if using, and add to the pot. Use an immersion blender to puree the soup until smooth. Return soup to low heat, add cream and adjust consistency with remaining chicken stock, if necessary. Season to taste with salt and freshly ground black pepper.
Grilled Cheese Croutons
Do you really need a recipe?
2 slices bread
cheese
butter
shaved Parmesan cheese
Butter bread on both sides, lay one slice bread on hot pan top with cheese,top with second piece of bread. Grill until golden brown, turn over, grill second side until golden brown (you want it toasted a little more than you usually would want). Place on cutting board, cut into cubes. Place on top of soup, garnish with shaved parmesan, if desired.
September 25, 2012 Daylight 11 hours, 53 minutes, 40 seconds Temp. 48º F
Thursday, September 20, 2012
Pecan Crispies
Our friends and back door neighbors moved. They pulled out yesterday, after a tearful goodbye and headed to a new adventure in Colorado. They took their twin girls, our dogs are very sad.
I am happy for them (no, really I am, really). A great opportunity waits for them in Colorado and they will be in the real world. Mark really missed the real world, and an Alaskan winter is hard on a person. Suzanne, with her ever cheerful smile and positive attitude, is a treasure. I'll miss her sense of humor, her willingness to try new things, and her bold approach to every situation.
So, I'm feeling a little sorry for myself today. When I look out the kitchen window, the backdoor house is dark, curtains pulled, waiting for new occupants. The weather is cold, overcast and gloomy, like me. I decided to cheer myself up and make cookies. So I did, and I'm stuffing my face with cookies and feeling sorry for myself. I need to straighten up, Suzanne would not approve.
Pecan Crispies
1 c. butter
1 c. firmly packed brown sugar
1 c. granulated sugar
2 eggs
1 tsp. vanilla
1 1/2 c. all-purpose flour
1/2 tsp. baking powder
1/2 tsp. baking soda
2 c. quick cooking oatmeal
1 1/2 c. crispy rice cereal
1 c. finely chopped pecans, toasted
In a large bowl cream butter and sugars until fluffy. Add eggs and vanilla, beat until smooth. In a small bowl, combine flour, baking soda, and baking powder. Add dry ingredients to creamed mixture. Stir in oats, cereal, and pecans. Shape dough into four 8-inch long rolls. Wrap in plastic wrap and chill 2 hours.
Preheat oven to 325ºF.
Cut dough into 1/2 inch thick slices. Place 2 inches apart on greased baking sheets. Bake 10-15 minutes or until bottoms are lightly browned. Transfer to wire rack to cool.
Makes about 4 dozen
September 20, 2012 Daylight 12 hours, 26 minutes, 48 seconds Temp. 53ºF
Tuesday, September 18, 2012
Happy Birthday with Walnut-Carrot Cake
September is a busy month in our office, school has started and we have three birthdays. That leaves two of us to plan. Anita, being the smart one of the two (me, being the other), thought we should order lunch and then have cake and ice-cream. She is brilliant!
I made the cake, a walnut carrot cake. The carrots were fresh from the garden. It is a moist, rich cake topped with a cinnamon cream cheese frosting. I had to stop myself from eating all the left over frosting, after I ate about a half a cup with a spoon, I did finally stop myself, only because I promised myself I would make cinnamon rolls later this week and use the left over frosting on them...can't wait.
| Use the small holes on your grater to make fine shreds for cake and muffins, like on the left. Use the large holes on your grater for salads, like on the right. |
I do feel very righteous when I eat carrot cake. Carrots are a vegetable and the cream cheese frosting is cheese so full of protein! You can't go wrong with veggies and protein. I hope you enjoy.
Carrot Cake with Cinnamon Cream Cheese Frosting
adapted from Back in the Day Bakery Cookbook
2 c. all-purpose flour
2 tsp. baking powder
2 tsp. baking soda
2 tsp. ground cinnamon
1/2 tsp. nutmeg
1 tsp. salt
1 1/4 c. canola oil
4 large eggs
1 c. granulated sugar
1 c. packed dark brown sugar
1 tsp. vanilla extract
4 c. finely grated carrots
1 cup chopped walnuts
Preheat oven to 350ºF. Butter two 9" round cake pans. Line the bottom with parchment and butter parchment. Lightly dust the pans with flour, tapping the pans to shake out the excess.
Sift together flour, baking powder, baking soda, cinnamon, nutmeg and salt; set aside.
In large mixing bowl, combine oil, eggs, both sugars, and vanilla and whisk until the mixture looks light and pale in color. Fold in the flour mixture in thirds until just combined. Gently fold in the carrots and walnuts until thoroughly combined.
Divide batter evenly between the prepared pans and smooth the top with a spatula. Tap the pans firmly on the counter top to remove any air bubbles from the batter.
Bake 40-50 minutes, until the center of the cake springs back a little when touched and a cake tester inserted in the center comes out clean. Let cool for 20 minutes, them remove the cake from the pans and transfer to a wire rack to cool completely.
To assemble the cake, level the tops of one of the cake layers with a serrated knife. Place it cut side down on a serving platter. Spread the top of the layer with frosting. Place the second cake layer on top, right side up, and frost the top and the sides with frosting. Decorate top or sides with chopped walnuts.
Cinnamon Cream Cheese Frosting
8 Tbs. butter (1 stick), softened to room temperature
2 8-oz. packages cream cheese, softened to room temperature
1 Tbsp. vanilla extract
1/2 tsp. ground cinnamon
5-6 cups confectioners' sugar
In the bowl of a stand mixer fitted with the paddle attachment, beat the butter, cream cheese, and vanilla until smooth and creamy. Gradually add the cinnamon and confectioners' sugar, beating until light and fluffy.
September 18, 2012 Daylight 12 hours, 40 minutes, 4 seconds Temp. 52ºF
Thursday, September 13, 2012
Frost and Soup
Well, there is no denying it now, winter is on the way. It frosted twice last week and my plants are worse for it. Time to pull the zucchini, the last of the (now slimy) flowers and the tomatoes. I'll put all the green ones in a box with a banana so they will ripen. I'll dig the potatoes, pull the carrots and leeks and clean up the last of the plant litter in the garden until next spring. It is a very sad thing and sort of depresses me.
| Oh, my poor zucchini plants, lost in the first frost. |
Dave is in moose camp (no moose so far) and this is my chance to cook things I like and he won't eat. One of those things is ham and bean soup. I love the smell of the soup as it simmers away, the warm smell it fills the house with. I love a warm bowl of soup for dinner after a long day. Dave doesn't agree with the idea of "soup can be dinner" attitude, he wants something with it. So while he is gone, I'll have soup a couple of times, then freeze the rest in serving size containers for my lunch.
I love it when Dave is in moose camp.
***Post Script
I put this soup together in the morning before work, turned on the crock pot and knew I was in for a treat, all my own, for tonight. About 2:00 Dave called and said he was on his way to town with meat for the butcher (they got a moose, so disregard the "no moose so far" comment above). I started to laugh and said, "Guess what's for dinner." Dave answered, "I don't care as long as it isn't bean soup."
Can you believe it. He can make a peanut butter and jelly sandwich, I'm having soup.
| One pound of cranberry beans before soaking. |
| One pound of cranberry beans after soaking in water overnight. |
Ham and Bean Soup
adapted from how my mom made it
1lb. dry beans, I used cranberry beans this time, use what you like
1 Tbsp. olive oil
1 onion
2-4 ribs celery
2 carrots
1 clove garlic
8 cups chicken broth
2-4 cups of diced ham, use what you have left-over or in the freezer
Rinse and check beans for stones, place in large bowl and cover with water leaving about 2-3 inches of water over the top of the beans. Soak overnight.
In the morning, rinse beans. Bring 8 cups chicken stock and beans to boil, boil 5 minutes. Meanwhile, chop onion, celery, and carrots. Heat pan and add olive oil, saute onion, celery and carrots for about 5 minutes until they begin to soften, add garlic and cook 1 minute more. Add vegetable mixture to crock pot.
After beans have boiled for 5 minutes, add to crock pot with vegetable mixture, add diced ham. Cover and cook 6-8 hours on high until beans are tender.
Tips:
Use what ever beans you like, navy kidney, cranberry, or a mixture.
Sometimes I buy the mixed bag of bean soup, but throw away the "flavor packet" that tastes gross
I had the butt of a small ham Dave used for sandwiches that I chopped and added, and I had about 1.5 cups of shredded pork in the freezer I also used.
September 13, 2012 Daylight 13 hours, 13 minutes, 17 seconds Temp. 49ºF
Thursday, September 6, 2012
New Lights
| My brother putting together the lights in my "studio" (my daughter's old room) |
If you have noticed the sunlight at the bottom of the posts, you see we are losing light quickly, about 6 and a half minutes a day right now. Considering my very limited knowledge of how to use my camera (the guy who posted that he gives classes never called back like he said he would), and the fact that I live in a dark hole, I purchased some lights! Now my pictures will still be bad, but they won't be dark.
My brother is in town from Kansas to go moose hunting with my husband. He came in on Sunday morning and was headed to camp on Tuesday. I treated him to some wonderful Alaskan experiences. I took him to walk the boreal forest train at Creamer's refuge and we walked through Pioneer Park aka Alaskaland to all of us who know. We had a little extra time, so he put together my lights, they came in 457 pieces all the way from Alabama.
Now, I just need the photography guy to call me back...
| My new lights put together and ready for the next picture. We'll see if it makes a difference! |
Tuesday, September 4, 2012
Banana Crunch Muffins
It is kind of funny how we use schedules to form a structure around our lives. Monday is clean the bathroom day, Tuesday is Taco night, Friday is movies and pizza... We need that stability, that sameness for us to feel connected and in control.
In control, ha! My friend, Donna says "Dogs, children and husbands are God's way of reminding us we are not in control." Boy is that ever true.
It isn't like I have control issues or anything (O.K. anyone who knows me can stop laughing right now). Well, maybe I do, just a little. And I do like sameness, routine, and the illusion that I can control it all and always look good and have my lipstick perfectly applied. I know the reality of it all is that I am in control of nothing, and slapping on some Dr. Pepper chapstick doesn't count.
Part of my routine, my sameness, is having Muffin Monday in the fall. I hear the geese leaving town early mornings when I am waking up, Dave heads off to Moose Camp with an assortment of buddies, the yard is put away for the winter, wood is stacked on the side of the house and I begin to bake in the mornings.
I'm starting Muffin Mondays with one of my all time favorites. It is from Ina Garten's Barefoot Contessa cookbook. They are moist, fragrant and have a bit of crunch from the granola added to the batter and to the top. They look as beautiful as they taste and they are the perfect way to get into the Fall routine of muffins. But I think I'll do something totally radical...like bring muffins on Tuesdays instead.
Banana Crunch Muffins
from The Barefoot Contessa Cookbook
3 cups all purpose flour
2 cups sugar
2 tsp. baking powder
1 tsp. baking soda
1/2 tsp. salt
1/2 lb. unsalted butter, melted and cooled
2 extra large eggs
3/4 cup whole milk
2 tsp. vanilla extract
1 cup mashed ripe banana
1 cup medium diced ripe banana
1 cup chopped walnuts
1 cup granola
1 cup sweetened shredded coconut
granola for topping
Preheat oven to 350º F.
Line 18 muffin cups with paper liners. Sift the flour, sugar, baking powder, baking soda, and salt into the bowl of an electric mixer fitted with a paddle attachment. Add the melted butter and blend. Combine the eggs, milk, vanilla, and mashed bananas, and add them to the four and butter mixture. Scrape the bowl and blend well. Don't overmix.
Fold the diced bananas, walnuts, granola, and coconut into the batter. Spoon the batter into the paper liners, filling each one to the top. Top each muffin with granola. Bake for 25-30 minutes, or until the tops are brown and the toothpick comes out clean. Cool slightly, remove from the pan and serve.
September 4. 2012 Daylight 14 hours, 13 minutes, 18 seconds Temp. 54ºF
Friday, August 31, 2012
Peach Cobbler
I love warm fruit desserts this time of year. The fruit is fresh and at it's peak of flavor and baking it warms the house since we are getting cool weather now. Other than one bad experience with having peaches for dinner, peaches are one of my favorite fruits to bake.
We were invited to a friend's house for dinner and I offered to bring dessert. I made this peach cobbler, took it out of the oven as we left the house for dinner so it would still be warm when we were ready to eat it. The topping is a crumbly, scone-like topping and it is so good with a dollop of ice cream melting over it. I took these pictures right out of the oven and then what was left after dinner. While my husband and friends are used to me taking pictures of our food, I wasn't sure about at a dinner party.
I will say, I work one of the ladies who went to the dinner. We were in a meeting and she started the meeting with telling me, again, how much she loved the cobbler (her words were, "It was perfection" not to brag but it was good and it made me feel good for her to say that). I guess it was a hit.
Peach Cobbler
fruit filling:
6 lbs. peaches, peeled and sliced
1/3-1/2 cup sugar, depending on peaches and your taste
cobbler topping:
adapted from The Back in the Day Bakery Cookbook
2 c all-purpose flour
1 Tbsp. baking powder
3Tbsp. granulated sugar
1/2 tsp salt
1/4 tsp. cinnamon
6 Tbsp. cold butter, cut into 1/2 inch cubes
3/4 c. heavy cream
Pre heat oven to 350ºF. Butter 9 inch deep dish pie plate.
Whisk together the flour, baking powder, sugar, salt, and cinnamon in a large bowl. Drop in the butter and, working quickly, cut it in with a pastry blender. You should have various-sized pieces of butter, from sandy patches to pea-sized chunks, and some larger bits as well.
Pour the cream over the flour mixture and toss together with a rubber spatula, until you have a soft dough; it is better o have a few dry patches than a tough dough. The dough will be soft and sticky.
Turn the dough out onto a sheet of plastic wrap or wax paper and cover with another sheet. Using a rolling pin, gently roll the dough into a 9 inch round. Place the dough on a baking sheet, still covered, and refrigerate while you make the filling.
Combine peach slices with the sugar, toss to mix. Pour into prepared pan and press fruit down.
Remove the chilled dough from the refrigerator and gently place on the fruit filling. Cut a decorative vent in the middle.
Bake for 60-70 minutes until the top is golden and puffed and the fruit is bubbling with juices. Cool at least 30 minutes before serving.
August 31, 2012 Daylight 14 hours, 40 minutes, 9 sec. Temp. 58ºF
We were invited to a friend's house for dinner and I offered to bring dessert. I made this peach cobbler, took it out of the oven as we left the house for dinner so it would still be warm when we were ready to eat it. The topping is a crumbly, scone-like topping and it is so good with a dollop of ice cream melting over it. I took these pictures right out of the oven and then what was left after dinner. While my husband and friends are used to me taking pictures of our food, I wasn't sure about at a dinner party.
I will say, I work one of the ladies who went to the dinner. We were in a meeting and she started the meeting with telling me, again, how much she loved the cobbler (her words were, "It was perfection" not to brag but it was good and it made me feel good for her to say that). I guess it was a hit.
Peach Cobbler
fruit filling:
6 lbs. peaches, peeled and sliced
1/3-1/2 cup sugar, depending on peaches and your taste
cobbler topping:
adapted from The Back in the Day Bakery Cookbook
2 c all-purpose flour
1 Tbsp. baking powder
3Tbsp. granulated sugar
1/2 tsp salt
1/4 tsp. cinnamon
6 Tbsp. cold butter, cut into 1/2 inch cubes
3/4 c. heavy cream
Pre heat oven to 350ºF. Butter 9 inch deep dish pie plate.
Whisk together the flour, baking powder, sugar, salt, and cinnamon in a large bowl. Drop in the butter and, working quickly, cut it in with a pastry blender. You should have various-sized pieces of butter, from sandy patches to pea-sized chunks, and some larger bits as well.
Pour the cream over the flour mixture and toss together with a rubber spatula, until you have a soft dough; it is better o have a few dry patches than a tough dough. The dough will be soft and sticky.
Turn the dough out onto a sheet of plastic wrap or wax paper and cover with another sheet. Using a rolling pin, gently roll the dough into a 9 inch round. Place the dough on a baking sheet, still covered, and refrigerate while you make the filling.
Combine peach slices with the sugar, toss to mix. Pour into prepared pan and press fruit down.
Remove the chilled dough from the refrigerator and gently place on the fruit filling. Cut a decorative vent in the middle.
Bake for 60-70 minutes until the top is golden and puffed and the fruit is bubbling with juices. Cool at least 30 minutes before serving.
August 31, 2012 Daylight 14 hours, 40 minutes, 9 sec. Temp. 58ºF
Wednesday, August 29, 2012
Banana Bread and putting up wood for winter
Putting up wood for the winter is a big job. Dave spends a lot of time cutting wood, bucking it up, splitting it, and then stacking it so it can dry. We use about 6 cords of wood every winter in the new wood stove. Because it is more efficient it saves us about 2 cords of wood a winter.
This year Dave had some wood delivered. It came in 8 foot lengths. Dave had to buck it up, split it and stack it (notice I said Dave, I didn't help). It is a huge job, and he'll be sore for the rest of the week, so will my brother in law, back door neighbor and oldest son since they all helped.
They got it all cut into lengths, some of it stacked and all of it split between Friday afternoon and all day Saturday. Sunday Dave spent the day stacking this pile. It was cold and rainy, so not very fun work.
I thought a warm treat was in store for him (and I had a pile of bananas that were very ripe) so I made banana bread.
Dave was anxious to get this wood stacked. He wants to leave for moose camp next weekend and the house rule is we have to have more wood at the house than he has at camp. I think the house is a couple cords short.
| A cord of wood is 4 feet high, 4 feet deep, and 8 feet long. We have about 3 cords here, stacked 6 feet high. |
This year Dave had some wood delivered. It came in 8 foot lengths. Dave had to buck it up, split it and stack it (notice I said Dave, I didn't help). It is a huge job, and he'll be sore for the rest of the week, so will my brother in law, back door neighbor and oldest son since they all helped.
| Sunday morning's project, stacking this split wood. |
I thought a warm treat was in store for him (and I had a pile of bananas that were very ripe) so I made banana bread.
| Dave next to the wood pile. It is about 6 feet high and 42 feet long. Dave looks thrilled to be doing this in the rain. |
Banana Bread
adapted from Baking Boot Camp
1/2 cup walnuts
2 c. all-purpose four
1/4 tsp. salt
1 tsp. baking powder
1/2 c. unsalted butter, softened
1/2 c. honey
1/2 c. granulated sugar
1 Tbsp. grated orange rind
3 very ripe bananas, peeled and lightly mashed
2 eggs
2 tsp. vanilla
Topping
2 Tbsp. brown sugar
1 Tbsp. oat bran
1 tsp. cinnamon
1/4 cup chopped walnuts
Preheat oven to 350ºF. Grease and flour a 9 inch loaf pan. Toast the nuts in a skillet over high heat, stirring frequently, until the nuts give off a good aroma and are just starting to brown. Immediately transfer the nuts to a a bowl and cool completely. Chop the nuts coarsely.
Sift together the flour, salt, and baking powder, add cooled, chopped nuts. Ina another bowl, cream the butter and sugar together until light and fluffy. Add the honey, grated orange rind and bananas and mix until well combined. Add the eggs, one at a time, to the banana mixture, beating well after each addition. Add the vanilla and mix until blended. Add the dry ingredients to the banana mixture all at once. Stir until they are just blended into the batter. pour the batter into the prepared loaf pan. Mix topping ingredient. Sprinkle topping over top of banana mixture.
Bake for 65-70 minutes, or until the bread begins to shrink from the edge of the pan and the center of the loaf springs back when lightly pressed. Remove the bread from the oven and let it rest for 10-15 minutes, then ease the bread out of the the pan and continue cooling on a rack.
August 29, 2012 Daylight 14 hours, 53 minutes, 27 seconds Temp. 53ºF
1/2 c. granulated sugar
1 Tbsp. grated orange rind
3 very ripe bananas, peeled and lightly mashed
2 eggs
2 tsp. vanilla
Topping
2 Tbsp. brown sugar
1 Tbsp. oat bran
1 tsp. cinnamon
1/4 cup chopped walnuts
Preheat oven to 350ºF. Grease and flour a 9 inch loaf pan. Toast the nuts in a skillet over high heat, stirring frequently, until the nuts give off a good aroma and are just starting to brown. Immediately transfer the nuts to a a bowl and cool completely. Chop the nuts coarsely.
Sift together the flour, salt, and baking powder, add cooled, chopped nuts. Ina another bowl, cream the butter and sugar together until light and fluffy. Add the honey, grated orange rind and bananas and mix until well combined. Add the eggs, one at a time, to the banana mixture, beating well after each addition. Add the vanilla and mix until blended. Add the dry ingredients to the banana mixture all at once. Stir until they are just blended into the batter. pour the batter into the prepared loaf pan. Mix topping ingredient. Sprinkle topping over top of banana mixture.
Bake for 65-70 minutes, or until the bread begins to shrink from the edge of the pan and the center of the loaf springs back when lightly pressed. Remove the bread from the oven and let it rest for 10-15 minutes, then ease the bread out of the the pan and continue cooling on a rack.
August 29, 2012 Daylight 14 hours, 53 minutes, 27 seconds Temp. 53ºF
Monday, August 27, 2012
Salmon Cakes
While salmon hot off the grill, is my favorite way to eat it, I also really enjoy salmon cakes. These are like the meatloaf of Fairbanks, everyone has their own way of doing it and it is a little different every time, depending on your mood and what you have handy.
I keep mine very simple so the flavor of the salmon shines through. I eat these cold, on a big bed of lettuce for lunch or warmed up and on a toasted bun with some tarter sauce for a heartier spread. I use what ever salmon is left over from dinner to make salmon cakes, then freeze them for lunches. Sometime I make extra salmon when we are grilling just so I have these ready to grab from the freezer in the mornings.
Salmon Cakes
I tried hard to keep track of what I did when I made these. Remember, like meatloaf, it doesn't have to be exactly the same every time.
1 cup cooked salmon, broken into small pieces (you can use a 7 oz can of salmon and adjust as needed)
1/4 cup finely chopped onions
1 tsp. dijon mustard
1 c. breadcrumbs
2 egg whites
Heat oven to 350ºF. Place cookie sheet in oven to heat.
Saute onions until soft. Add onions, mustard, breadcrumbs and egg whites to salmon. Mix well. Using a 1/2 cup or an ice-cream scoop, scoop out salmon mixture and form into patties. Remove cookie sheet from oven, spray with non-stick spray. Place patties on cookie sheet and place in oven. Bake for 10 minutes, turn patties over and bake 5 more minutes.
August 27, 2012 Daylight 15 hours, 7 minutes, 8 seconds Temp. 53ºF
Tuesday, August 21, 2012
Salmon on the grill
To say I eat a lot of salmon is an understatement. I eat salmon one or two nights a week and then for lunch two or three days a week. I love the stuff.
Last year, my brother-in-law went fishing down on the Kenai and brought home his limit of salmon and stored it in my freezer. They were filleted and vacuum sealed, they were lovely. This year a friend gave us some Copper River Reds. They are so beautiful and delicious. Dave filleted them and vacuum sealed them and they sit in the freezer for a winter of feasting on salmon.
Dave won't eat salmon. Or, I should say, doesn't care for salmon. He will eat smoked salmon but he says he ate more than his share growing up. I am the only one at home that will eat the salmon (if you don't count the dogs and they just get the skin). I did share some at work, but really I am hoarding the rest for myself.
I will grill a fillet and have some for dinner, then cut it into 'me serving size" portions and wrap it, freeze it and have it ready for lunch. All I need is some salad and I top it with a piece of salmon and I am in heaven.
There are countless ways to top the salmon but my favorite is pure maple syrup and cayenne pepper. Brush it on top and grill. The salmon is sweet with a little kick at the end. It is the perfect way to prepare it especially if you are going to use the salmon for another recipe like salmon patties or salmon salad for sandwiches (recipes to follow).
I know I'm very spoiled when it comes to my salmon. I know my salmon is fresh, I know it is wild and I know people down in the real world pay big bucks for it and I get it for free. If you are ever in town, stop by, I'll have Dave throw a fillet on the grill and we'll have a delicious dinner.
Salmon on the Grill
1 salmon fillet
1/4 cup maple syrup (the real stuff)
1/4 tsp. cayenne
Preheat grill and turn one side off. Rinse salmon and pat dry with paper towels. Mix syrup and cayenne pepper. Place salmon on "off" side of grill, brush with syrup mixture. Close lid of grill and let salmon cook for about 7 minutes. Baste with syrup mixture a second time. Close lid and grill another 7 minutes, or until fish is cooked through.
Serve.
August 21, 2012 Daylight 15 hours, 47 minutes, 53 seconds Current Temp. 61ºF
Wednesday, August 15, 2012
Nutella Meringue
It is amazing how good you feel after you've been sick! I am not a sick person by nature, but last week I was thrown for a loop, or thrown loopy. I got vertigo and the world spun around and around for about a week. (Dave says he has always known I was a little dizzy, now there is a medical diagnosis to go along with it)
Well, the spinning is gone, I'm back on my feet and to celebrate, I drank champagne and made Nutella Meringues. You just can't get any better than that.
I have decided that these are true health food. Meringues are basically egg whites and a little sweetener. Egg whites are good protein. Nutella states in the advertising that is a healthy...and I believe everything I hear in commercials so protein and a healthy chocolate/hazelnut addition. How can you go wrong? If nothing else, when I eat these crispy, chewy meringues I am happier and that is good for anyone's health.
Nutella Meringues
from Cream Puffs in Venice
Yields 15 to 20 meringues (depends on how big you make them)
3 large egg whites, at room temperature
a pinch of cream of tartar
a pinch of salt
1/2 cup + 1 tablespoon, granulated sugar
1/4 cup Nutella
a pinch of cream of tartar
a pinch of salt
1/2 cup + 1 tablespoon, granulated sugar
1/4 cup Nutella
Preheat the oven to 300 degrees F. Make sure you have one oven rack in the bottom third of your oven and one in the upper third of your oven.
Line two baking sheets with parchment paper and set aside.
Set up a double boiler (a pot with another pot on top or a heat-proof bowl on top) and put the Nutella in the top of the double boiler. Warm the Nutella through and then set aside while you make the meringue. (You could warm the Nutella in a microwave but I don’t own one so you’re on your own if you do use one.) Let the Nutella cool as you make the meringue.
In the bowl of a stand mixer, fitted with the whisk attachment, place the egg whites. Beat on medium-high speed until they are completely foamy.
Add the cream of tartar and the salt and continue whipping at medium-high speed until when you lift the whisk attachment, soft peaks form. This should take a few minutes.
Once you have reached the soft peak stage, increase the speed to high and begin adding the sugar a few spoonfuls at a time (this should take a few minutes).
Once all the sugar is in, the meringue should be very thick (almost stiff) and when you left the whisk firm peaks should remain.
Remove the bowl from the mixer and drop in all the Nutella. With a rubber spatula, gently fold the Nutella into the meringue three or four times. You’re aiming for a swirled effect so don’t overmix. This will also help avoid deflating the meringue.
Using two spoons, drop the meringue onto the parchment-lined baking sheets in large dollops.
Place in the oven for 10 minutes. After 10 minutes, immediately lower the heat to 200 degrees F. and rotate the trays. Bake for an hour.
After an hour, check the meringues. If they are completely dried out then turn the oven off and leave the meringues in the oven for a few hours to cool with the oven. If the meringues still look a bit “wet”, then continue baking for another 20 minutes or so. Either way, once fully baked, turn off the oven and leave the meringues in there for a few hours.
When you remove the meringues from the oven they should be completely dry and cool and will sound hollow when you tap the bottoms.
The meringues will keep in an airtight container for a week.
Enjoy!
August 15, 2012 Daylight 16 hours, 29 minutes, 1 second Current Temp: 67ºF
Monday, August 13, 2012
Cabbage Salad
This is a big bowl of happiness. Cabbage salad with sunflower seeds and dried cranberries. I love it, I especially love the fact that I grew the cabbage and carrots. The dressing is a light vinaigrette made creamy with a little non-fat yogurt.
I made this for dinner after a long day in the garden, pulling spent plants, harvesting veggies, and pulling the never ending chickweed. It was crunchy, sweet, tart and oh, so good. We'll be eating this a lot for the next couple of weeks.
Cabbage Salad
1/4 head green cabbage, shredded
1/4 head purple cabbage, shredded
2 carrots, shredded
2 Tbsp. sugar or honey
2 Tbsp. cider vinegar
3 Tbsp. vegetable oil
1/4 cup non-fat greek yogurt
handful of sunflower seeds
handful of dried, sweetened cranberries or cherries
Mix green cabbage, purple cabbage and carrots together. Set aside.
Mix sugar or hone with vinegar, stir until sugar is dissolved, add oil and whisk. Add yogurt and whisk until smooth. Pour over cabbage and carrots, mix well and let sit for about 30 minutes. Add cranberries and sunflower, mix. Keeps several days covered in the refrigerator.
YUM!
August 13, 2012 Daylight 16 hours, 42 minutes, 48 second Current Temp: 62ºF
I made this for dinner after a long day in the garden, pulling spent plants, harvesting veggies, and pulling the never ending chickweed. It was crunchy, sweet, tart and oh, so good. We'll be eating this a lot for the next couple of weeks.
Cabbage Salad
1/4 head green cabbage, shredded
1/4 head purple cabbage, shredded
2 carrots, shredded
2 Tbsp. sugar or honey
2 Tbsp. cider vinegar
3 Tbsp. vegetable oil
1/4 cup non-fat greek yogurt
handful of sunflower seeds
handful of dried, sweetened cranberries or cherries
Mix green cabbage, purple cabbage and carrots together. Set aside.
Mix sugar or hone with vinegar, stir until sugar is dissolved, add oil and whisk. Add yogurt and whisk until smooth. Pour over cabbage and carrots, mix well and let sit for about 30 minutes. Add cranberries and sunflower, mix. Keeps several days covered in the refrigerator.
YUM!
August 13, 2012 Daylight 16 hours, 42 minutes, 48 second Current Temp: 62ºF
Subscribe to:
Posts (Atom)