Showing posts with label canning/freezing. Show all posts

Wednesday, August 19, 2020

Cauliflower "Mac" and Cheese and Putting up the Garden


I'm not a big gardener, I plant just enough to make me feel like a gardener.  I have 4 raised beds I use to grow some veggies and I like lots of flowers.

This year I planted 12 cauliflower plants, 6 of broccoli, 6 cabbages, 2 eggplant (for the first time), Swiss chard, lettuce, radishes, 4 green zucchini and 2 yellow squash, 2 cucumber plants and the tomatoes in the greenhouse.

Now, this year it rained a lot, so watering was pretty easy...I didn't have to do it much, which is a good thing because my dad isn't here to water for me.  But the problem with my garden is that everything is ready at the same time! I put harvesting off as long as possible (you can see in the picture below, one of my cauliflowers started to spread), but I finally had to deal with all that broccoli and cauliflower.

Freezing broccoli and cauliflower doesn't take a lot of work, just be organized and follow the steps.

Why does it all have to be ready at the same time?
Freezing Cauliflower and Broccoli

1) Cut cauliflower (and Broccoli) from garden, bring inside and wash.

2) Place large stock 2/3 full of water on stove and heat to a roiling boil.

3) While water is heating, cut cauliflower into desired sized florets.

4) Set up ice bath in sink, cold water and lots of ice (in Fairbanks we can skip the ice, our water comes out of the tap that cold)

5) Place several layers of towels on a table or big counter.

6) Once water is boiling, generously salt the water (this is optional)

7) Place about 4-6 cups of florets in the boiling water and set timer for 5 minutes for cauliflower or 3 minutes for broccoli.

8) When the time beeps, remove the florets from the boiling water (I use a big skimmer) and place in the ice bath until all the florets are cold. While one batch of florets are cooling, I start another batch in the boiling water.

9) Once the florets are cold, remove them from the ice bath to a colander to drain.

10) Once drained, tip them onto the layers of towels to dry further. I use a towel to GENTLY dry the tops, you don't want squished florets.

11) Place dried florets in sheet pans lined with parchment and freeze.

12) Once frozen transfer florets to ziplock bags and return to freezer until needed.
Blanched, dried and frozen for packaging.
I got some giant broccoli too.
Blanched broccoli drying, almost ready for the freezer.

So that is the way I blanched and froze 9 gallon bags of cauliflower and 3 gallon bags of broccoli.  The nice thing about freezing the florets this way is the florets don't freeze together and you can take out as much as you want and return the rest of the bag to the freezer.

But 9 gallons of cauliflower is a lot for Dave and me so I need to get a little creative in ways to fix it so Dave doesn't get too tired of it.  He loves mac and cheese, so I decided to give the "cauli and cheese" a try.  It was a hit! He even ate left-overs for lunch the next day.  


Cauliflower and Cheese

1 med. head cauliflower
1/2 cup heavy whipping cream, or use 1/4 c. cream and 1/4 c. almond milk or water
3 oz. cream cheese
1 tsp. onion powder
1 tsp. garlic powder
1 cup shredded sharp cheddar cheese
1/2 cup shredded mozzarella cheese
1/2 cup grated parmesan cheese, divided
1/4 cup ground pork rinds, or pork panko

Preheat oven to 350°.  Line a baking sheet with parchment paper, spray a baking dish with cooking spray or butter.

Wash the cauliflower and break into small florets.  Place on prepared baking sheet and bake for 15 minutes.  

Meanwhile, make sauce. In a medium saucepan or a microwave safe bowl, mix whipping cream, cream cheese, onion powder, garlic powder, cheddar, mozzarella and 1/4 cup grated parmesan cheese.  Heat until melted and completely mixed and smooth.  
Gently mix cauliflower into the cheese sauce and pour into prepared baking dish.  
Mix remaining 1/4 cup parmesan and the ground pork rinds and sprinkle over the top of the cauliflower.  Bake for 20-30 minutes until golden on top and bubbly.  


1 year ago:    Birthday Cupcakes and Learning to Decorate
3 years ago:   Layered Panna Cotta and Dave's New Puppy
5 years ago:   Tazlina Wedding
7 years ago:   Lemon Bars

August 19, 2020   Sunrise 5:52 am  Sunset 9:53 pm  Temp. H 72/L 50°F

Wednesday, March 18, 2020

Being Distracted


I know I am a very distracted person.  That leads to all kinds of problems for me and my lack of coordination because I'm not really paying attention to my surroundings.  It also leads to some embarrassing situations, like this one.

I was leaving work and thinking about all the things I had to get done before my next trip, things for work, things for home, groceries for Dave, all that kind of stuff.  I had started by car to warm up with my auto start but when I got to my car it wasn't running.  I figured I just was in my office finishing up longer than I thought and the auto start turned off.  Well, I opened the door and saw some papers and other things on the passenger seat where I was about to drop by purse and lunch bag before I unplugged my car.  My passenger seat doesn't have anything on it, my car is completely clean and only an extra reusable bag in the back in case I go to the grocery store on the way home.  I look at the rear view mirror where I have a little hanging decoration a friend made me a few years ago and it was gone.  I quickly realized I had opened the door to the wrong car.  Same make, model and color, but wrong car.  I laughed out loud, closed the door and turned to find my car.

Just then the auto start turned on.  I'm sure the owner of that car was looking out her window and watched me open the door.  How embarrassing.

So, I needed a sweet treat.  I had a couple pints of strawberries and have been wanting some jam so I decided to try my hand at it.  I read a couple recipes on Pinterest, lots of recipes use chia seeds but I don't eat those so I needed something else to thicken it a bit.  I tried xanthan gum and it worked great.  This is my new go-to jam!

Sugar Free Strawberry Jam

2  dry pints of strawberries, washed and chopped
1/4 cup Swerve, Boca Sweet or Monk Fruit
1/4 cup water
1/2-1 tsp. xanthan gum, depending on desired consistency

Place strawberries, sweetener and water in a medium saucepan.  Bring to a boil and reduce to simmer.  Let simmer 10-15 minutes stirring and crushing the fruit.  If desired use an immersion blender to make a smoother jam.  Remove from heat and whisk in 1/2 tsp. xanthan gum.  Let cool 15 minutes, stir to test consistency and add more xanthan gum if desired.  Pour into jars and refrigerate or freeze.  This made about 3 cups for me.


1 year ago:    Happy Anniversary!
7 years ago:   Changing the Clocks and Quinoa Blondies


March 18, 2020  Sunrise 7:55am  Sunset 8:03pm  Temp. H 33/ L 24˚F

Tuesday, January 21, 2020

Instant Pot Chicken and Chicken Stock


I'm a little slow with new kitchen devices, ok very slow.  But my brother in law brought me up to speed a bit with my birthday gift this year.  He got me an Instant Pot.

I've looked at these and talked to some friends about them, but wasn't convinced so I never made the purchase.  Well I don't know what I was waiting for, this thing is awesome.  

I decided to test it with a chicken, I needed some shredded chicken for chicken salad for lunch this week.  I put a chicken on the trivet, rubbed it with some butter, sprinkled salt and pepper, and added a quartered onion.  Put 1 1/2 cups of water in the bottom and cooked it for 30 minutes with the poultry setting.  I did a quick steam release let it cool about 10 minutes and then pulled it out of the pot and shredded it. It was perfect!  Juicy, fall off the bone tender, and I pulled off the skin and fried it for chips.

Once I removed all the meat, I threw the carcass back into the pot with the cooking liquid, added 1 lb. of bone in chicken thighs, some celery, apple cider vinegar, salt and pepper and filled the pot up to the 2/3 mark and processed on high for 2 hours.  It made the best chicken bone broth and so quick! And because I was gifted the 8 quart pot, it made a ton of broth for my freezer.  Well, now I'm hooked.  
I'll be experimenting with the Instant Pot a lot for a while.  I have plans for chocolate cake, ribs (how nice in the summer not to start the oven for my barbeque ribs), onion jam, and what ever else I can come up with from Pinterest!

What are your favorite Instant Pot recipes?

1 year ago:     Dog Emergency
5 years ago:   Easy Chicken Cassoulet
7 years ago:   Dog Sledding

January 21, 2020  Sunrise 10:10 am  Sunset 3:54 pm  Temp H -12/ L -18°F

Monday, January 13, 2020

Rocky Road Ice Cream


So far, 2020 has been a pretty rocky road.  I got sick and needed breathing treatments and we lost our dear Lilly unexpectedly.  So, in true Toni fashion I am eating my way through it!

I received these marshmallows in a Keto Krate and wasn't sure what to do with them, then 2020 hit and I knew I needed to make some rocky road ice cream. 

Now I have never met an ice cream I don't like and this one is so delicious!  I'll have to order these marshmallows often just to be sure this ice cream in always in my freezer.
Rocky Road Ice Cream
2 cups heavy cream
1/4 cup butter
1/2 cup Boca Sweet (this helps keep the ice cream scoopable, but erythritol will work)
3 oz. unsweetened chocolate, chopped fine
2 tsp. vanilla extract
2 Tbsp. vodka (helps with texture but optional)
1 cup marshmallow, cut into small pieces
1 cup almonds, chopped

In a medium saucepan heat 1 cup of the cream and butter until butter is melted and mixture just starts to bubble around the edges.  Remove from heat.  Add sweetener and chocolate.  Let sit for 5 minutes.  Stir until completely mixed.  Add the rest of the cream, vanilla and vodka.  Cool in refrigerator for 1 hour.  Process in ice cream maker according to manufacturers directions, adding nuts and marshmallows in the last minute.  Place in container and freeze for 2 hours to harden.

1 year ago:    Coconut custard Pie and the Vet Visit
3 years ago:  Movie on the Plane and Chocolate Mousse
5 years ago:  Nutella Mug Cakes for My Birthday

January 13, 2020  Sunrise 10:32am  sunset 3:27pm  Temp H -5/ L -9°F

Tuesday, May 7, 2019

Mexican Shredded Beef

Mexican Shredded Beef and margaritas - the perfect
Cinco de Mayo combination!

We celebrated Cinco de Mayo at home with Margaritas, tacos, and loaded nachos.  And since it was Sunday and we worked on chores around the house all day (I shampooed carpets), I needed an easy dinner.

I am in full Spring Cleaning mode right now.  Walls are getting washed, curtains washed, windows washed, carpets shampooed...and after HOURS of cleaning I turn around and find a pile of dog hair my dogs shed, it is so discouraging.  But Franklin (my iRobot) still does his afternoon sweep up and I try to ignore the rest.  Sunday was a very productive day and by 5:00 I was tired but still had to get some dinner together.

I love planned left-overs.  Dishes like lasagna where I make two at the same time, because that is so easy, and stick one in the freezer for later. Or pulled pork, because it makes so much that after dinner I portion it and have a couple more meals ready to throw together because the meat just needs to be heated.  And this Mexican Shredded Beef, it makes a ton and I can put containers in the freezer so dinner can be quick and easy.
Loaded nachos - grain free chips

Now I'm being honest here and I made this beef a couple of weeks ago in the crock pot, we had dinner, and I put several meal sized containers in the freezer for later.  It is one of those containers I pulled out and used for dinner on Sunday.  And I know I have dinner for a couple more nights when I come home from work too tired to cook or when I can finally get outside and work in my garden and won't have time to cook, so much healthier (and cheaper) than running across the street to our favorite Mexican restaurant.

So, I hope you had a happy Cinco de Mayo, a productive weekend, and are looking at a fun week.  We are still Spring cleaning, but we are also eating really well.
Dave's Sunshine Salad: greens covered with Mexican Shredded Beef
tomatoes, avocado, cheese, and surrounded by tortilla chips.

Shredded Mexican Beef

5 lb. fresh brisket
1 red bell pepper, sliced in strips
1 yellow bell pepper, sliced in strips
1 small onion, sliced in half moons
1/2 cup beef bone broth
1 cup tomato sauce
3 pkgs. taco seasoning, or I use this homemade blend X3 plus salt

Spray a 6 quart slow cooker with cooking spray or oil the inside lightly, add the bone broth, sliced peppers and onion.  Cut the brisket, across the grain, in 2-3 inch strips and place in slow cooker.  Mix tomato sauce with taco seasoning and pour over brisket.  Cook on low for 6-8 hours or high for 4 hours.  Remove beef from slow cooker, shred discarding any large areas of fat.  Return beef to slow cooker and stir to mix in the cooking liquid.  Serve.

1 year ago:    30 Days Dairy Free and the First Fail
3 years ago:  Low Propane in the COW and Chicken Marsala
5 years ago:  Strawberry Mousse
7 years ago:  Hiving the Bees and Bee Cupcakes

May 7, 2019  Sunrise 4:56 am  Sunset 10:41 pm  Temp: H 63/ L 28˚F

Thursday, January 11, 2018

Moussaka


This is a new favorite.  I love moussaka.  When I was in college, my group of friends would have a dinner once in a while and choose a country.  We would all pick out dishes from that country and then bring them together to try.  When we chose Greece, I chose moussaka.  I was just learning to cook and moussaka was very ambitious for me.  It worked, but I was exhausted and didn't try it again for years!

This is a Keto recipe and so quick!  I use ground moose and with just Dave and myself home now, I make it in two 8X8 pans so we have dinner, left-overs for lunch and another pan in the freezer for when I'm gone or too lazy busy to cook.  I've made it over and over, and Dave still says he likes it and will eat it again.
I made it during the week Gman and his people were up
Thanksgiving week.  Gman approved.
This dish, with a salad is the perfect winter dinner.  I have a couple pans of this in the freezer for later this month when I'll be recovering from the second reconstruction surgery.  Easy for me and Dave, and a warm delicious dinner.

Skillet Moussaka

Eggplant Layer
1 small eggplant (about 12 ounces)
1 tsp fine sea salt
1 tsp. ground black pepper

Meat layer
1 Tbsp. butter
1/2 cup chopped inions
2 cloves garlic, smashed to a paste or minced
1 lemon, thinly sliced
2 Tbsp. dried oregano leaves
1 cup flat leaf parsley leaves, chopped
1.5 lbs. ground lamb, beef, or moose
2 cup finely diced mushrooms
1 tsp. sea salt
1/2 tsp. ground black pepper
1/4 tsp. nutmeg
1 cinnamon stick
1 cup tomato sauce

Cheese sauce
1/4 cup butter
1/2 cup bone broth (homemade or store bought)
2 large eggs, separated
8 oz. feta cheese, crumbled
Pinch of ground nutmeg


Preheat oven to 350˚F.

To prepare the eggplant layer, cut the stem off the eggplant and remove the skin with a vegetable peeler.  Slice the eggplant lengthwise into 1/8 inch thick planks.  Season both sides of the slices with salt and pepper.  Place the eggplant on a greased rimmed baking sheet and bake for 15 minutes or until soft.  Remove the eggplant from the oven, but leave the oven on if you are baking the moussaka right away.

Meanwhile, make the meat layer.  Heat 1 Tbsp. butter in a medium skillet over medium heat.  Add the onions, garlic, lemon slices, oregano, and parsley.  Cook, stirring often, until the onions are soft, about 3 minutes.  Add the ground meat and mushrooms.  Stir to crumble the meat.  Add the salt, pepper, nutmeg, and cinnamon stick, then stir in the tomato sauce.  Simmer, uncovered, for 10 minutes, then remove from the heat.

Place 1/2 the meat mixture in one 9 X 13 or two 8X8 pans.  Place a layer of eggplant slices over the meat (dividing evenly if using two pans), top with the remaining meat mixture, top with another layer of eggplant.  Set aside.

Make the cheese sauce.  In a saucepan over low heat, combine the 1/4 cup of butter and the broth.  When the butter is melted, whisk in the egg yolks, feta cheese, and nutmeg and stir just until combined.  Beat the egg whites until very stiff, then fold them into the sauce.  Pour the cheese sauce over the eggplant in the pan.

Place the pan in the oven and bake the moussaka for 30-40 minutes, until the top is golden.  Let cool for 10 minutes before serving. 

3 years ago:   Easy Cassoulet - the Perfect Winter Dinner
5 years ago:   So Long to a Good Friend

January 11, 2018  Sunrise 10:35am  Sunset 3:22pm   Temp H 2/ L -5˚F


Monday, December 4, 2017

Leek Confit


The last job I had from our garden is taking care of all the leeks.  Dave pulled them last fall and piled them in the bottom of the garage fridge.  I was gone for work, then surgery and I just wasn't feeling like dealing with them, but that is one beauty of leeks; they stay in the garden until the last minute and they keep in a cool dark place for a long time.

But now it was time.  I needed to do something with them before they started to spoil.  I used some in a few recipes, but I needed to take care of all of them now.

I made leek confit.  You cook the leeks in butter and a little salt until they are reduced and the flavor is concentrated.  It takes some time but the hardest part of this is cutting the leeks.  It turned out I had 3 (18 cups) batches of leek confit to make, so it was an all-morning project, with most of that time reading cookbooks, scrolling through Facebook, and complaining to Dave how long it takes!


Now I have frozen containers of deliciousness to use in omelets and quiche, on sandwiches, I love it on top of cream cheese as part of a cheese plate or a little nibble with a cocktail, warmed and used to top chicken, pork, or  beef,  added to chicken soup, potato and leek soup, or added to a vegetable or rice dish to add an subtle layer of extra flavor.

I don't think this is really a "recipe" and it is very flexible.  The leeks cook down to a jammy sweetness.  It keeps in the fridge for a week, but I bet it won't last that long.  I freeze this in 2 cup containers and when I pull one out to use, any left-over is gobbled up on Dave's lunch, (usually he eats left-overs from dinner the night before).

Make sure you wash your leeks well, they are known to be gritty.  Swish them around in water after you cut them and pull the leeks up out of the water after they sit for a few minutes, leaving the grit at the bottom of the bowl.  I use my salad spinner to get as much water out as possible, but a bit of dampness helps them cook, so don't dry them completely.  If you wash them ahead of time and they are totally dry, add a couple tablespoons of water to the leeks when you start to cook them.  It will evaporate in the end of cooking.

Leek Confit

1/4 cup butter
6-7 cups leeks, cut into 1/4 inch half moon slices and washed well (about 4 very large or 5-6 medium)
     use the white and light green part only
1/2 tsp. salt
1-2 Tbsp. water, if needed

Melt butter, over medium-low heat, in a large, heavy bottomed pot or skillet.  Add leeks and salt (water if needed).  Add leeks and stir to coat with butter.  Cover pot and cook for 20-25 minutes, stirring occasionally.  Remove cover and cook 5 minutes more or until the liquid is evaporated.  Leeks should have a thick, almost jammy consistency.  Cool and store in refrigerator for 1 week or freeze for 6 months.

1 year ago:    Oat, Seed and Nut Crackers
3 years ago:  Sometimes Homemade Bread is Love, Even if You Use a Bread Machine
5 years ago:  A Month full of Cookies and Cranberry, Pistachio Coins

December 4, 2017   Sunrise 10:28 am  Sunset 2:53 pm   Temp. H 26/ L16°F


Friday, February 12, 2016

Beef Pot Pies and Getting Ready to Travel

I'm getting ready for my spring travel season.  I'm on the road from Feb. 29 until May 11 or so.  Each week I am trying to get something into the freezer for dinners for the family.  I know it won't take care of all the nights, but maybe once a week or so someone can just pull something out of the freezer and stick it in the oven or the crock pot.  

I would go all out and do a "30 crock pot meals in a day" kind of thing, but Dave is not really fond of crock pot meals.  So I'll do a couple crock pot meals, sticks some ziplocks with marinated meat in the freezer to grill, and have these beef pot pies ready to bake.  It's not a lot, but it is one way of saying I miss and love my family while I'm gone.


Beef Pot Pies
3-4 lb. beef pot roast
salt and pepper
olive oil
1 onion, diced
2 ribs celery, diced
2 carrots, diced
2 cloves garlic
2 Tbsp. tomato paste
2 cups red wine
4 cups beef broth
4 baking potatoes, cubed
4 carrots, diced
1 16 oz. pk. frozen corn
1 16 oz. pk. frozen peas
4 cups good beef broth, depending on liquid from roast
7 Tbsp. all purpose flour
5 Tbsp. butter
pastry for 3 double crust pies
For the Beef,
Preheat oven to 325°
Heat olive oil in dutch oven, salt and pepper beef, sear in dutch oven until all sides are browned, set aside on a plate.  Add more oil to pot, add onions, celery, and carrots.  Cook until softened. Add garlic and tomato paste, stir for 1 minutes. Add red wine, reduce to half, add beef broth, return roast to pan, including any liquid on the plate.  Cover roast and place in oven for 3-4 hours.  Remove roast from oven and let cool.  Strain solids from liquid and reserve liquid.  Discard solids.  Dice beef.
Bring diced potatoes to boil in large pot.  Add carrots once the water is boiling and cook for 3-5 minutes, until slightly tender.  Drain and cool with cold water.  Mix carrots, potatoes, peas, corn and beef together, set aside.  
Measure liquid from dutch oven.  Add beef broth until liquid measures 6 cups.  Melt butter in medium saucepan.  Add flour and cook, stirring very often, until flour is dark tan and toasted.  Add liquid and whisk so no lumps form.  Stir until mixture boils.  Strain mixture through fine mesh sieve and add to vegetable and beef mixture.
Use 3 regular size disposable pie pans, 18 miniature pie pans or a combination.  I figure 6 mini pans for every regular pie.  If I am making a large pie, I line the bottom of the pan with crust and add a top crust over the filling, if I'm using small pans, I just add a top crust.
Divide beef mixture among desired number of pans, top with crust and wrap top with plastic wrap.  Then wrap with foil and add reheating instructions to top.  I always remind my family to remove the plastic wrap, that stuff is easy to miss if you are in a hurry, or throw the whole thing in the oven, foil and all.


February 12, 2016   Sunrise 9:01 am  Sunset 5:11 pm  Temp. H 12/ L 9°F


Monday, November 18, 2013

Sunday morning and a Pot of Beans


I love Sunday morning.  I'm the first one up by a long shot.  Everyone else is sleeping in so I get a little more quiet time.  I can reflect on the last week (and last week was a doozy!), plan for the next week, read some recipes and cook.

So if you are a regular reader, here is an update of what has been going on...

Our little Miss Leah is home from the hospital.  Mom, Grandmas, Grandpas, Great-Grandmas and Great Grandpa are all fighting over who gets to hold her next.  Everything is going well and the problem with the seizures was due to a calcium and magnesium deficiency, she has had no problems since they leveled her out with a cal/mag drip and she is happy at home.

Fairbanks had a wonderful winter storm; snow, rain, ice, power outages (some people are going over 90 hours without power and heat today and the temp. is dropping), trees fell on houses and cars...it was a real mess.  You can read about it here at Fairbanks Daily News Miner.  We were very lucky, no trees, no electrical outages, and Dave drove me to work.

The Bboy and his chick arrived Monday night.  They made it without a hitch and are settling in.  Adding two more dogs to our pack is a little exciting, but we all will adjust.  Lucky for us, the kids drove from Haines to Fairbanks between snowstorms and were tucked in at home safe and sound before the rain hit.

So, here I sit, Sunday morning, extremely thankful for a healthy baby, a safe family at home, heat and electricity, and more dogs than you can shake a stick at.


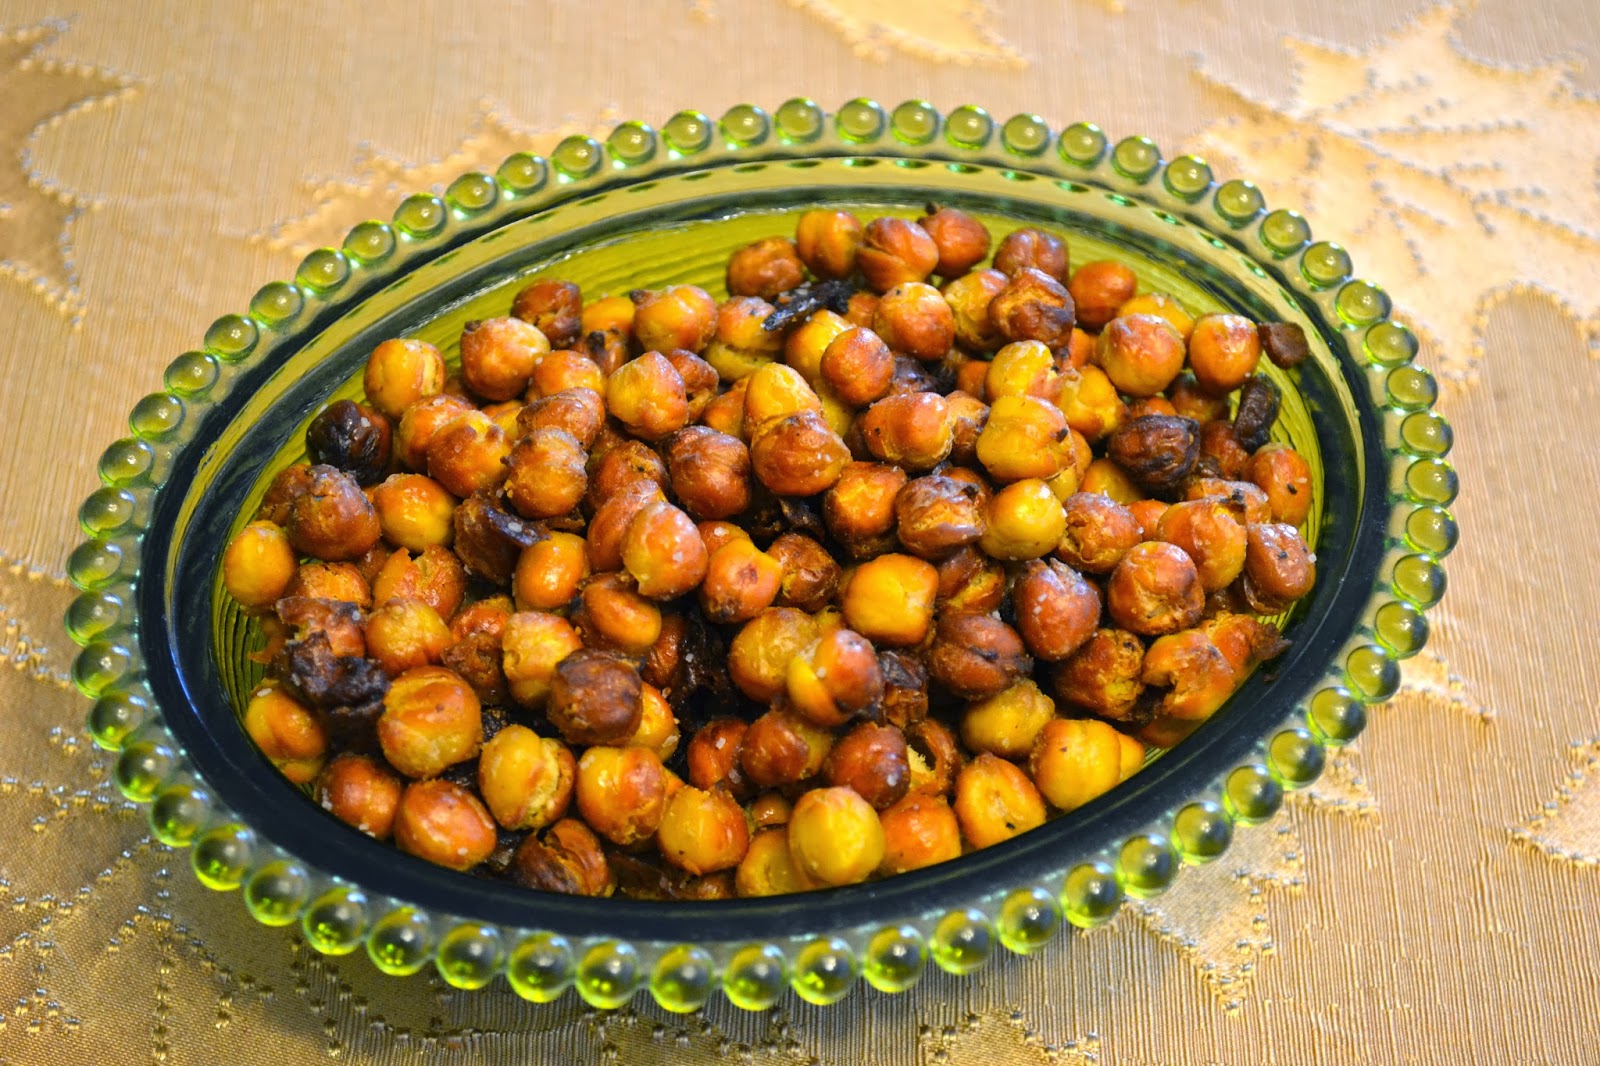
I have my happy light going, the fire crackling, and a pot of beans on the stove.  I like to make a big batch of beans, portion it, freeze it and then I always have a variety on hand to throw into soup, on top of a salad, in taco meat, or to make a dip.  Fine Cooking had a master recipe this month for chick peas, and I'm trying to add more fiber to the Bboy's diet (he has diverticulitis) and reduce salt (he also has high blood pressure.  I'm sure he would be so happy to know I am sharing this with you!) Chick peas are not something we use a lot of, so I thought I would experiment a little.  Short of hummus (you know the white stuff you serve at holidays (inside joke)), I don't really use them too much.  I'm cooking the dried beans today, I'll roast some for a snack later, use some for a puree with our chicken, and add some to cabbage later this week.  Recipes to follow.

Chickpeas with bay leaves and herbs
adapted from Fine Cooking Oct/Nov 13

1 lb. dried chickpeas (about 2.5 cups)
1 small yellow onion, peeled and quartered
3 large springs of fresh flat-leaf parsley*
3 large springs fresh thyme*
2 bay leaves
Kosher salt

Put the chick peas in a large bowl, cover with cold water by a couple of inches, and refrigerate for at least 6 hours or up to 24 hours.

Drain and rinse the chickpeas.  Transfer to a 6-quart pot.  Tie the onion, herbs and bay leaves in a piece of cheesecloth and add the bundle to the pot.  Add 10 cups cold water and bring to a boil, skimming off any foam.  Turn the heat down to maintain a gentle simmer and cook until just tender, about 1 hour.

Add 2 tsp. salt and continue cooking until the chickpeas are fully tender and creamy on the inside but retain their shape, 15-30 minutes more.

Drain the chickpeas, reserving the cooking liquid; discard the herb bundle.  Let the chickpeas and the reserved liquid cool to room temperature.  Refrigerate in separate airtight containers for up to 5 days.

*Fairbanks did not have fresh thyme or parsley when I went to the store, so I had to use dried.

Roasted Spicy Chickpeas
15 oz. chickpeas, from above recipe (about 2 good cups) or 1 can
1 tsp. Tabasco original hot sauce
1/2 tsp. salt
1/2 tsp. black pepper
2 tsp. olive oil

Preheat oven to 400°F.

Line baking sheet with aluminum foil.

Mix all ingredients in a bowl, stirring to coat well.  Pour onto baking sheet in a single layer.  Bake for 25 minutes, shaking pan every 10 minutes or so.  Chickpeas are done when they are crunchy.

1 year ago: Gingerbread Biscotti
2 years ago: Hard Apple Cider

November 18, 2013   Daylight 5 hrs, 55 min, 23 sec   Temp. H 0/ L -7°F

Friday, November 8, 2013

Apple Butter


**Random Kid update**The Baby Boy and his Chick are getting on the Ferry for Alaska TODAY in Bellingham, Washington...

When I lived in Kansas with my mom, one of the Fall activities I enjoyed was going to an orchard and picking fruit.  Apples and peaches (except for the unfortunate "Peaches" incident,) were picked, processed and stored.  I loved the smell of the house as my mom made apple butter, apple pie filling, peach pie filling, peach jelly...

Dave took me to the store on Sunday, I'm still not driving after my fall and sprained ankle.  I needed some curtains for the new windows in the dinning area.  I went to pick out the curtains, then went to the Starbucks and got a coffee to wait for Dave (he had to to the shopping).  As I sat there, an older man got his coffee and sat down and began to visit with me.  Turns out his name was Tony and he was 86.  We had a nice visit while we sipped our coffee.  One of the things we talked about is how people buy everything we used to make; like bread, butter, and jam.  He had grown up on a farm, like I did, and you either made it or you did without.

Living in Fairbanks, it really isn't cost effective to make your own like we did on the farm.  And, I certainly don't need anymore excuses to eat sweets or have the need to store a year's worth of food.  But I do love the smell of the house while something simmers on the stove (or in this case the crock pot).  So I made apple butter in the crock pot. Dave had to go back and get some apples and when we got home, I made a small batch, just enough for some filling in spice muffins, the topping for my yogurt, and on some toast.
I used a mix of Granny Smith and Jazz apples


A kitchen towel to help with the evaporation process

About 4 hours into the cooking.
After 10 hours of cooking and a spin with the emersion blender.

I certainly didn't need it, but it did smell wonderful, taste delicious, and I'm sure my ankle is better for it eating it.  I'll look for Tony next week when I go shopping to thank him for the great idea.
A dollop of apple butter on my yogurt/cottage cheese snack.  YUM!

Apple Butter
this made about 2.5 cups of apple butter
6 Granny Smith Apples, peeled, cored and chopped
6 Jazz Apples, peeled, cored and chopped
2 Tbsp. ground cinnamon
1/2 tsp. ground nutmeg
1/4 tsp. ground cloves

Place all ingredients into slow cooker.  Cook on high for 1 hour, turn to low, place a kitchen towel under the lid and down the sides to help steam escape (or just set the lid off center to allow steam to escape) and cook 8-10 hours more.  At this point you can break down the apples with a pastry blender or use an immersion blender to puree, depending on the texture you enjoy.

Let cool completely, pack in small containers and freeze.

I do not add sugar, I think it is sweet enough without, but you could add granulated sugar or brown sugar to taste.  Start with 1/2 cup.  Remember, it will be sweeter as it thickens and loses the water as it cooks.

November 8, 2013   Daylight 7 hrs, 0 min, 46 sec.   Temp H 18/ L 12°F

Wednesday, September 25, 2013

Stock: Chicken and Mushroom

Mushroom stock
I've been a little stressed lately.  I am a person who needs a plan, the plan can change, but it needs to be in place.  I have been living on hold, without a plan.  I hate that (and so does anyone who is around me).

About a month ago, I was offered a new job.  It is with a new employer.  Not a big deal for many of you, but I have worked for the same employer for the last 29 years.  I was a teacher, a principal, and a program coordinator for the same school district.  And now, I was offered a job with the University of Alaska K-12 outreach program for their Alaska Teacher Placement center.  I told them what I wanted in order to move, and they offered it to me!  I will be "retiring" from the school district and moving across town to the University of Alaska. I start October 4, I am very excited.

But between the time I told them what I wanted and the time they offered it to me, I have been a nervous mess.  What do I do when I am nervous?  I cook, I bake, I make stock!
1 cup containers

The nice thing about stock, is it really takes minimal effort, and you get a lot of production.  And, because I was more than a little nervous, I made two kinds of stock; chicken and mushroom.  Having homemade, frozen stock on hand is like having a golden treasure in the freezer.  Soup takes on a whole new flavor, risotto is even more of a treat, and gravy is richer and more delicious.
3 cup containers for soup and risotto

There are a million ways to make stock, don't get hung up about having the "right" ingredients.  If you googled chicken stock you will come up with 100 million ways to make it.  Chicken, onions, salt and pepper can make a basic chicken stock.  Add carrots and celery, a little thyme and it is even better.  For mushroom stock replace the chicken with mushrooms and add a little marsala or bandy to the veggie sweat and you are in business.  So, here are the recipes I use.  Make some stock, I'll bet you never use store bought again.

Chicken Stock
3 3-5 lb. whole chickens
2 Tbsp. olive oil
3 onions, roughly chopped
6 carrots, roughly chopped
6 celery ribs, roughly chopped
Big bunch of thyme
1 garlic head, unpeeled, top 1/3 cut off
2 Tbsp. salt
2 tsp. pepper
8 quarts water

In a 20 quart stockpot, over med. low heat, add olive oil, onions, carrots, and celery.  Cook until soft and fragrant, about 8-10 minutes.  Add 8 quarts of water, chickens, thyme, garlic, salt and pepper. Bring to a boil.  Reduce heat and simmer, uncovered for 4 hours, skimming foam as needed. Strain entire contents of pot through cheesecloth, discard solids (I save the chicken meat for the dogs, but it really is used up so you just toss).  Refrigerate overnight.  Remove fat from top of broth, discard or use for another purpose.  Place in freezer containers, leaving some headroom for expansion as it freezes.

Mushroom stock
adapted from Food and Wine Magazine

2 tablespoons extra-virgin olive oil
1 pound mushrooms, chopped
1 large onion, chopped
2 medium carrots, chopped
1 celery rib, chopped
4 garlic cloves, chopped
1 thyme sprig
1 bay leaf
1/2 teaspoon whole black peppercorns
1/2 cup Marsala or brandy
2 quarts water

In a pot, heat the oil. Add the mushrooms, onion, carrots, celery, garlic, thyme, rosemary, bay leaf and peppercorns and cook over high heat until the vegetables are softened, 15 minutes. Add the Marsala and cook until evaporated, about 5 minutes. Add the water and bring to a boil. Simmer over moderate heat until reduced to 6 cups, 2 hours. Strain the stock, pressing down on the solids.
September 25, 2013  Daylight 11 hrs. 55 min. 18 sec.   Temp H 43/ L 28°F

Monday, September 23, 2013

Jalapeño Jelly

Dave got home from moose camp and it went something like this:

D: Honey, I'm home.

Me: Oh good, I can hardly wait to get to bed.

D: O.K., but don't you want me to shower first?

Me: I don't really care.

D: Well, I don't want to climb into bed without a shower.

Me:  O.k. but I'm going now.

D:  Don't you want to wait for me?

Me: Not really, it's better if you aren't there.

D:  Um, what are you talking about?

Me:  Sleep, I'm so tired.  I haven't had a good night sleep since you left.  What were you talking about?

And so, I win "Wife of the Year" in 5 sentences.

I got a great night's sleep.  Dave was in the house so I slept deeply.  And he was sulking, reading a book on the couch, so I got the whole bed.  It was a win-win for me.
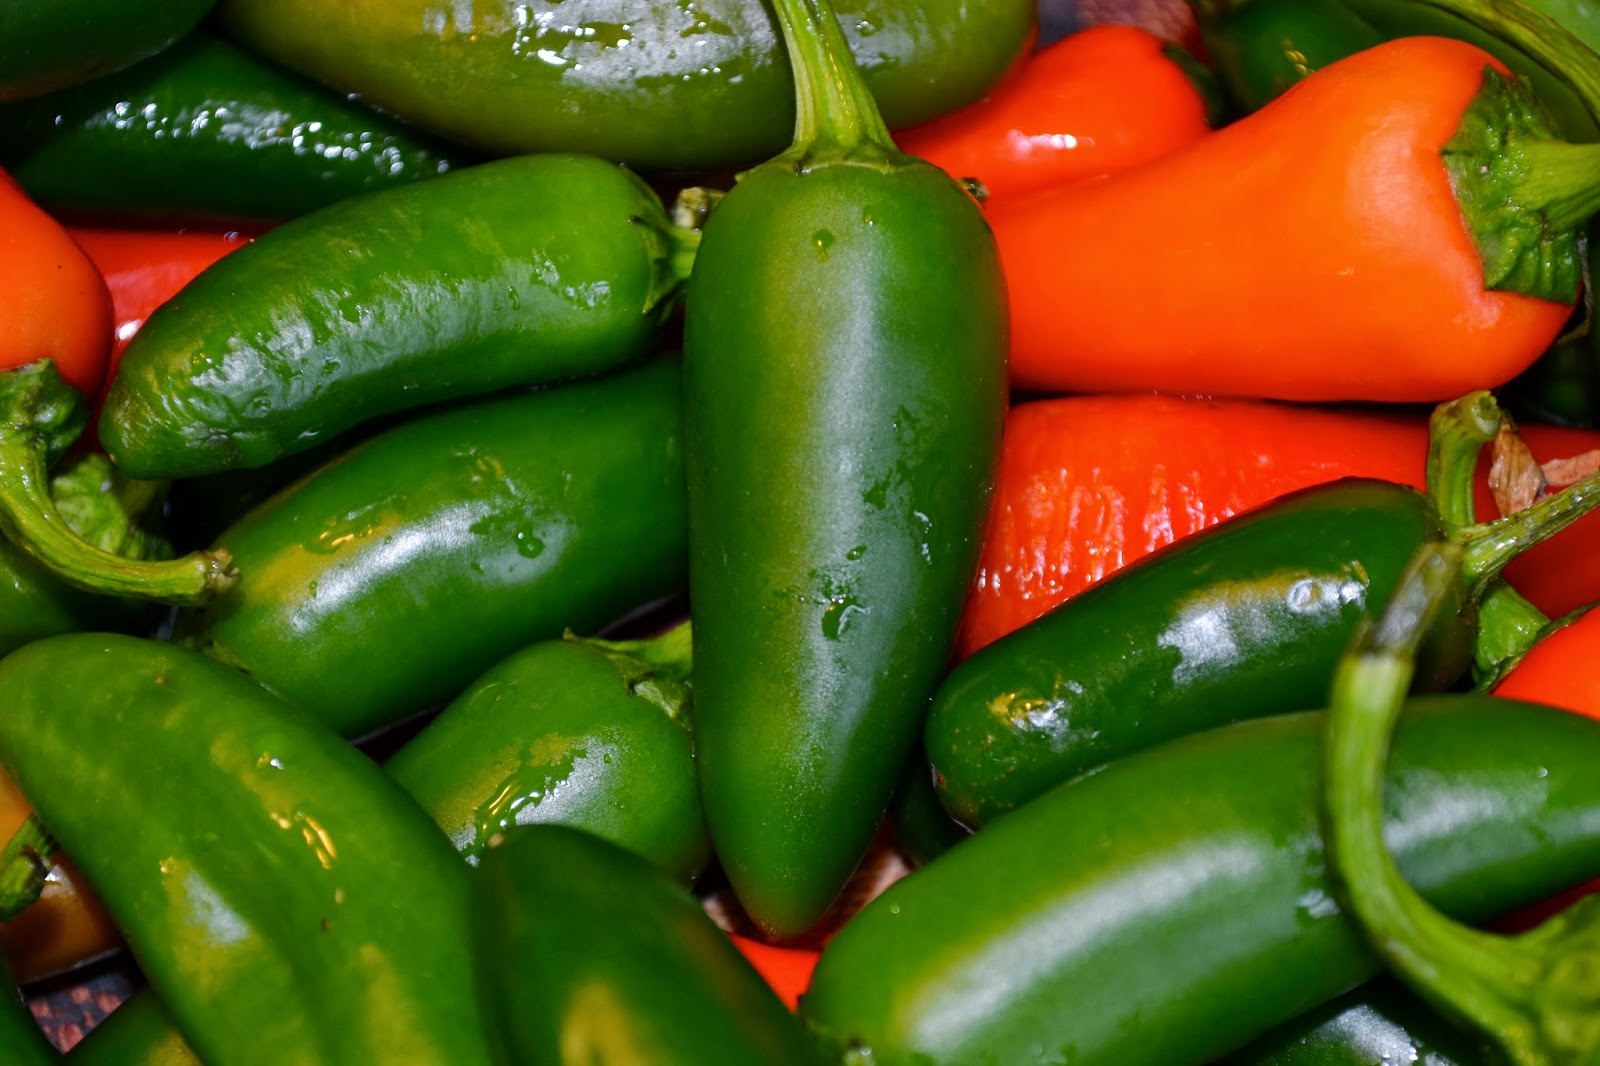
Jalapeño peppers from my friend Katie.

To spice things up for him, I made Jalapeño Jelly.  This is a pretty sweet version so I leave the seeds and veins of the jalapeño peppers intact.  You can seed and devein the peppers to cut down on the heat, and cut down on the sugar, just check your pectin requirements.  It is delicious over cream cheese with crackers, and Donna suggested it as a dip for Coconut Shrimp.  I'll try that later this week.

Jalapeño Jelly
Ball Canning

12 oz. Jalapeño peppers (about 12 medium)
2 cups cider vinegar
6 cups sugar
2 3-oz pouches liquid pectin
green food coloring (optional)

Prepare boiling water canner.  Heat jars and lids in simmering water until ready to use.

Puree  peppers in food processor with 1 cup vinegar until smooth.  Do not strain puree.

Combine puree with remaining 1 cup cider vinegar and sugar.  Bring to boil over high heat.  Boil 10 minutes, stirring frequently.

Add liquid pectin and boil for 1 minute, stirring constantly.

Remove from heat, add food color, if desired, skim foam.  Ladle hot jelly into hot jars leaving 1/4 inch headspace.  Wipe rim, Center lid on jar and apply band until fingertip tight.

Process in hot water bath for 10 minutes, once water boils.  Remove jars and cool.  Check seals after 24 hours.  If any jars are not sealed store in refrigerator.

September 23, 2013    Daylight  12 hrs., 8 min. 33 sec.   Temp H 36/ L 21°F